How I prepare my fabric for cutting and storage

Why do I prepare my fabric for cutting and storage?

Folds, creases and twists in fabric can prevent me from following my 4 Golden Rules

Yardage and pre-cuts purchased from a store or from my stash may:

Example of fabric that has been cut off grain
This is an example of fabric that is twisted and off-grain

My recommendation

Before I add fabric to my stash or make any cuts, I:

How I remove folds and creases

I remove folds and creases by:

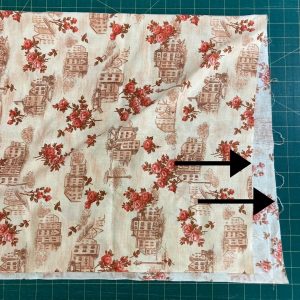
  1. flattening out the fabric into a single layer on my ironing surface (Diagram 1)
  2. lightly spraying the fabric with water, Mary Ellen’s Best Press or starch
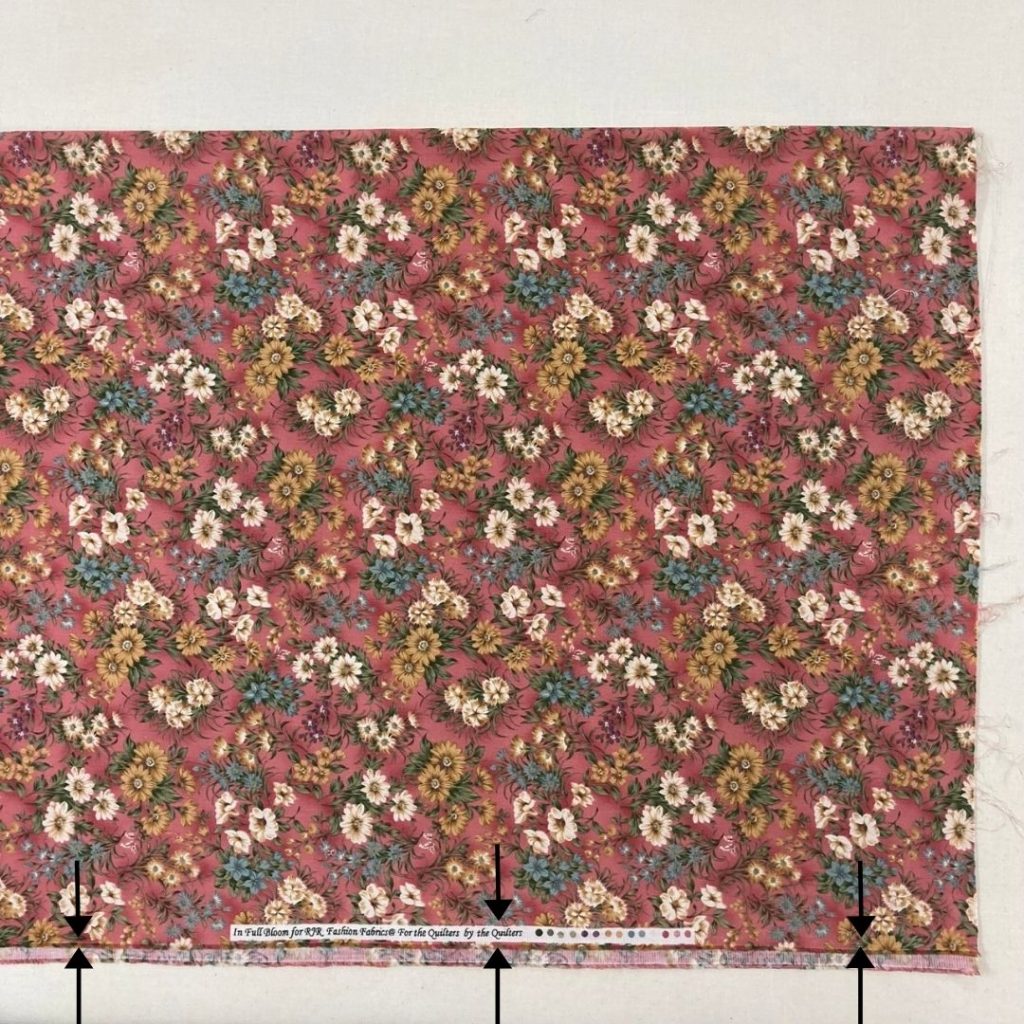
  3. pressing the fabric with a hot, dry iron until all of the wrinkles are gone (Diagram 2)
  4. if the fabric is yardage, I fold selvedge-to-selvedge, making sure that the selvedges stay parallel and that there are no twists in my fabric (as shown by the red arrows in Diagram 3)
Diagram 1: I layout my fabric on my ironing surface
Diagram 2: I press with a hot dry iron until all of the wrinkles are gone
Diagram 3: If the fabric is yardage, I fold selvedge to selvedge

How I remove twists

Twists in fabric may be caused when the manufacturer folds the fabric in half and rolls the fabric onto the bolt at high speed

Therefore, when the fabric is cut for me at the fabric store, the piece of fabric that I purchase may have a twist

If this has happened, I pull the fabric back into shape by:

  1. removing folds and creases from my fabric before I remove twists (refer above)
  2. firmly but gently pulling 2 diagonally opposite corners and then repeat for the other 2 corners (shown by the black arrows in Diagram 4)
  3. laying out the fabric in a single layer on my ironing surface
  4. folding selvedge-to-selvedge ensuring that the selvedges are aligned (shown by the black arrows in Diagram 5)
  5. pressing the folded yardage with a hot iron until all of the wrinkles are gone
Remove twists in fabric_pull corners opposite corners
Diagram 4: Firmly but gently pull 2 diagonally opposite corners and then repeat for the other 2 corners
Remove twists from fabric_fold selvedge to selvedge
Diagram 5: Fold selvedge-to-selvedge ensuring that the selvedges are aligned

How I fix an off-grain edge

Fabric is off-grain when the warp and the weft threads (ie cross-grain and the straight-grain) are no longer at 90°

Therefore, when the fabric is cut for me at the fabric store, the piece of fabric that I purchase may be off-grain

If this has happened, I can straighten the grain by first removing the twists in my fabric

Once I have remove the twists, the raw edge is likely to be off-grain, so I need to cut that edge straight by:

  1. removing folds and creases from my fabric before I remove twists
  2. removing twists from my fabric
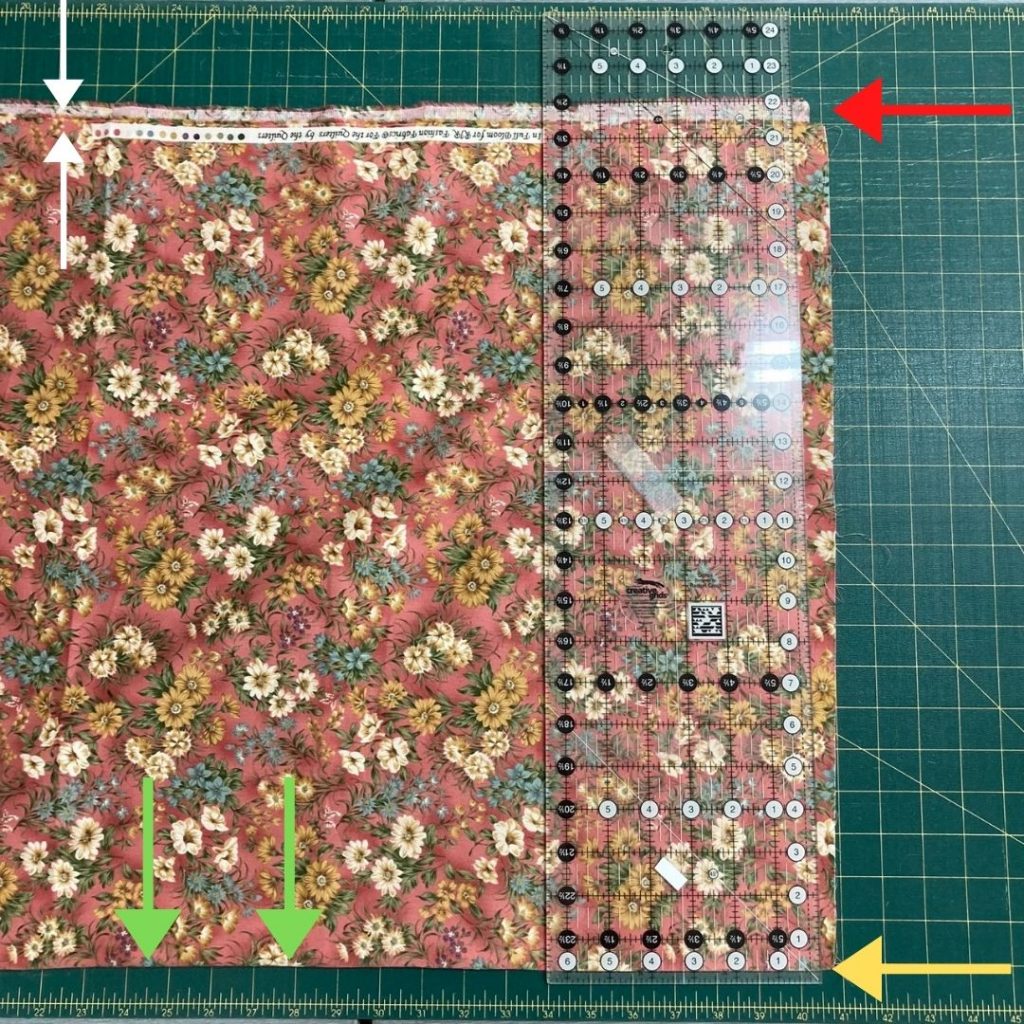
  3. laying the folded edge of the fabric along the bottom of my cutting board (as shown by the green arrows in Diagram 6)
  4. laying the selvedge edges together along the top of my cutting board (as shown by the white arrows in Diagram 6)
  5. laying the off-grain edge on the right-hand side of my cutting board (as shown by the red arrow in Diagram 6)
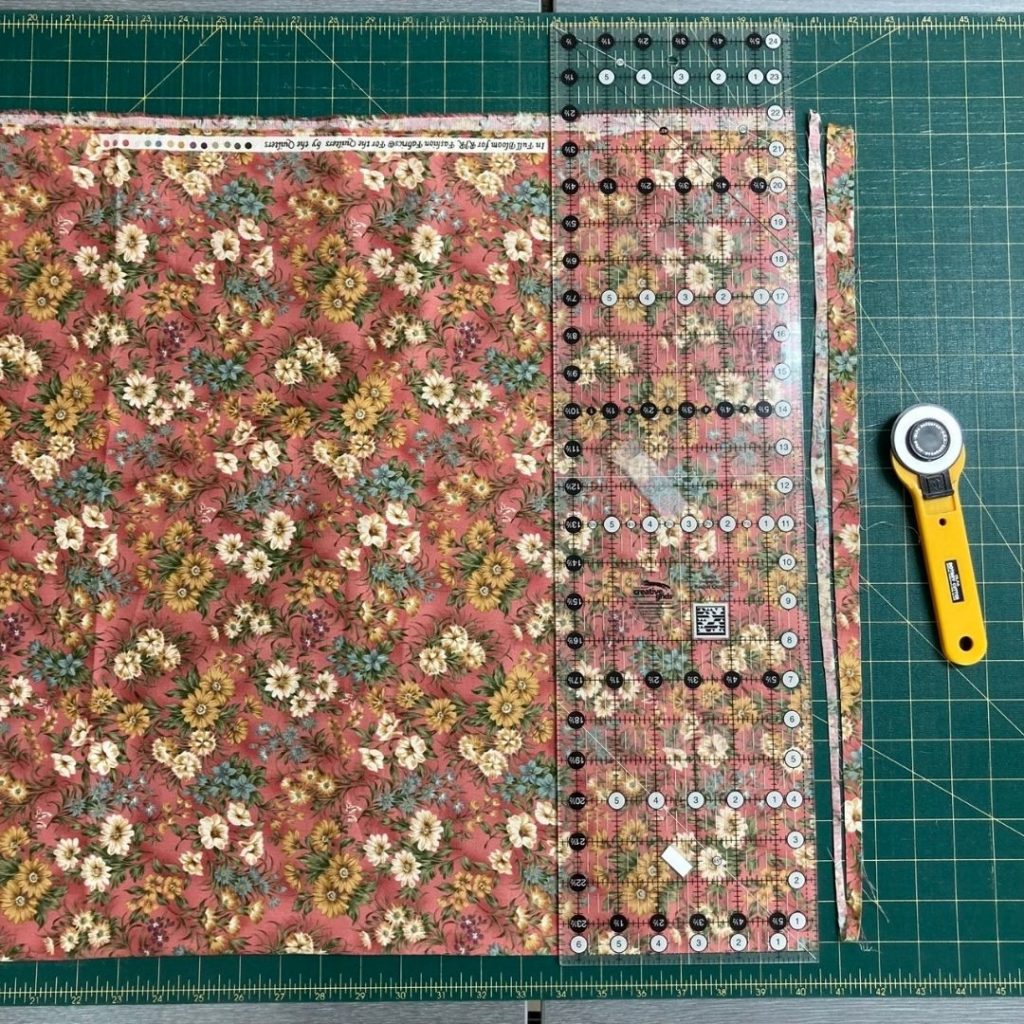
  6. laying my ruler on top of the fabric, aligning one of the ruler grid lines with the fold of the fabric (as shown by the yellow arrow in Diagram 6) , making sure that I allow enough fabric beyond the right-hand edge of my ruler so that I can make a neat cut and remove 1 continuous piece, giving me a straight on-grain edge (as shown in Diagram 7)
  7. Make the cut (as shown in Diagram 7)
  •  
Preparing off-grain fabric for trimming first edge
Diagram 6
Cut one continuous piece
Diagram 7

Helpful links